
Ent 是一个开源的 Go 语言实体框架。它与更传统的 ORM 类似,但具有一些独特功能,使其在 Go 社区中非常受欢迎。Ent 最初是由 Ariel 在 2019 年开源的,当时他在 Facebook 工作。Ent 诞生于管理具有非常大且复杂数据模型的应用开发的痛点,并在 Facebook 内成功运行了一年后才能开源。在 Facebook 开源项目毕业后,Ent 于 2021 年 9 月加入了 Linux 基金会。
本教程面向想从零开始构建一个简单项目:一个极简内容管理系统的 Ent 与 Go 初学者。
在过去几年中,Ent 已成为 Go 中增长最快的 ORM 之一:

来源: @ossinsight_bot 在 Twitter,2022 年 11 月
Ent 的一些常被引用的特性:
一个类型安全的 Go API,用于操作数据库。 忘掉使用
interface{}或反射来操作数据库。使用纯 Go 代码,编辑器能识别,编译器能强制。
采用图语义建模 – Ent 使用图语义来建模应用数据。这使得通过简单 API 遍历复杂数据集变得非常容易。
例如,获取属于关于狗的组的所有用户。可以用 Ent 写出两种实现方式:
// 从主题开始遍历。
client.Topic.Query().
    Where(topic.Name("dogs")).
    QueryGroups().
    QueryUsers().
    All(ctx)

// 或:从用户开始遍历并过滤。
client.User.Query().
    Where(
        user.HasGroupsWith(
            group.HasTopicsWith(
                topic.Name("dogs"),
            ),
        ),
    ).
    All(ctx)
- 自动生成服务器 – 无论你需要 GraphQL、gRPC 还是符合 OpenAPI 的 API 层,Ent 都可以生成所需代码,让你在数据库之上创建高性能服务器。Ent 会生成第三方模式(GraphQL 类型、Protobuf 消息等)以及针对读写数据库的重复任务的优化代码。
- 与 Atlas 集成 – Ent 构建时与Atlas紧密集成,Atlas 是一个功能强大的模式管理工具,具有许多高级功能。Atlas 可以自动为你规划 schema 迁移,并在 CI 中验证或直接部署到生产环境。(完全披露:Ariel 和我是 Atlas 的创建者和维护者)
必要条件
你可以在 此仓库 找到本教程中展示的代码。
第 1 步:设置数据库 schema
你可以在 此 commit 找到这一节的代码。
先使用 go mod init 初始化项目:
go mod init github.com/rotemtam/ent-blog-example
Go 确认模块已创建:
go: creating new go.mod: module github.com/rotemtam/ent-blog-example
我们演示的第一个任务是设置数据库。我们使用 Ent 构建应用的数据模型。使用 go get 获取:
go get -u entgo.io/ent@master
安装后,使用 Ent CLI 初始化两个实体:User 和 Post:
go run -mod=mod entgo.io/ent/cmd/ent new User Post
注意创建了若干文件:
.
`-- ent
    |-- generate.go
    `-- schema
        |-- post.go
        `-- user.go

2 directories, 3 files
Ent 为我们的项目生成了基本结构:
generate.go– 在接下来的章节会看到,该文件用于调用 Ent 的代码生成引擎。schema目录,包含每个请求实体的ent.Schema。
接下来定义实体的 schema。User 的定义如下:
// Fields of the User.
func (User) Fields() []ent.Field {
   return []ent.Field{
      field.String("name"),
      field.String("email").
            Unique(),
      field.Time("created_at").
            Default(time.Now),
   }
}

// Edges of the User.
func (User) Edges() []ent.Edge {
   return []ent.Edge{
      edge.To("posts", Post.Type),
   }
}
我们定义了 name、email、created_at 三个字段(created_at 默认值为 time.Now())。由于系统中 email 必须唯一,添加了 Unique 约束。还定义了名为 posts 的边到 Post。在关系型数据库中,边会转成外键和关联表。
// Post holds the schema definition for the Post entity.
type Post struct {
   ent.Schema
}

// Fields of the Post.
func (Post) Fields() []ent.Field {
   return []ent.Field{
      field.String("title"),
      field.Text("body"),
      field.Time("created_at").
            Default(time.Now),
   }
}

// Edges of the Post.
func (Post) Edges() []ent.Edge {
   return []ent.Edge{
      edge.From("author", User.Type).
         Unique().
         Ref("posts"),
   }
}
在 Post 里同样定义了 title、body、created_at 三个字段,并定义了从 Post 到 User 的 author 边。由于每篇文章只有一位作者,设为 Unique。用 Ref 告诉 Ent 该边的反向引用是 User 的 posts 边。
Ent 的强大在于它的代码生成引擎。开发时每次修改应用 schema,都需要调用 Ent 的代码生成器,重新生成数据库访问代码。这使得 Ent 能为我们提供类型安全且高效的 Go API。
现在尝试执行:
go generate ./...
看到生成了大量新的 Go 文件:
.
`-- ent
    |-- client.go
    |-- context.go
    |-- ent.go
    |-- enttest
    |   `-- enttest.go
/// .. Truncated for brevity
    |-- user_query.go
    `-- user_update.go

9 directories, 29 files
有了 data model,接下来创建数据库 schema。
安装最新的 Atlas,只需在终端执行以下任意命令,或查看 Atlas 官网:
- macOS + Linux
- Homebrew
- Go
- Docker
- Windows
curl -sSf https://atlasgo.sh | sh
brew install ariga/tap/atlas
go install ariga.io/atlas/cmd/atlas@master
docker pull arigaio/atlas
docker run --rm arigaio/atlas --help
如果容器需要访问主机网络或本地目录,使用 --net=host 并挂载所需目录:
docker run --rm --net=host \
  -v $(pwd)/migrations:/migrations \
  arigaio/atlas migrate apply
  --url "mysql://root:pass@:3306/test"
下载 最新发布版,并将 atlas 可执行文件移动到系统 PATH。
Atlas 安装好后,创建初始迁移脚本:
atlas migrate diff add_users_posts \
  --dir "file://ent/migrate/migrations" \
  --to "ent://ent/schema" \
  --dev-url "docker://mysql/8/ent"
看到两个新的文件:
ent/migrate/migrations
|-- 20230226150934_add_users_posts.sql
`-- atlas.sum
SQL 文件(文件名会因机器时间戳不同)包含在空 MySQL 数据库中设定 schema 的 DDL 语句:
-- create "users" table
CREATE TABLE `users` (`id` bigint NOT NULL AUTO_INCREMENT, `name` varchar(255) NOT NULL, `email` varchar(255) NOT NULL, `created_at` timestamp NOT NULL, PRIMARY KEY (`id`), UNIQUE INDEX `email` (`email`)) CHARSET utf8mb4 COLLATE utf8mb4_bin;
-- create "posts" table
CREATE TABLE `posts` (`id` bigint NOT NULL AUTO_INCREMENT, `title` varchar(255) NOT NULL, `body` longtext NOT NULL, `created_at` timestamp NOT NULL, `user_posts` bigint NULL, PRIMARY KEY (`id`), INDEX `posts_users_posts` (`user_posts`), CONSTRAINT `posts_users_posts` FOREIGN KEY (`user_posts`) REFERENCES `users` (`id`) ON UPDATE NO ACTION ON DELETE SET NULL) CHARSET utf8mb4 COLLATE utf8mb4_bin;
为开发环境使用 Docker 启动本地 mysql 容器:
docker run --rm --name entdb -d -p 3306:3306 -e MYSQL_DATABASE=ent -e MYSQL_ROOT_PASSWORD=pass mysql:8
最后,在本地数据库上执行迁移脚本:
atlas migrate apply --dir file://ent/migrate/migrations \
  --url mysql://root:pass@localhost:3306/ent
Atlas 报告已成功创建表:
Migrating to version 20230220115943 (1 migrations in total):

  -- migrating version 20230220115943
    -> CREATE TABLE `users` (`id` bigint NOT NULL AUTO_INCREMENT, `name` varchar(255) NOT NULL, `email` varchar(255) NOT NULL, `created_at` timestamp NOT NULL, PRIMARY KEY (`id`), UNIQUE INDEX `email` (`email`) CHARSET utf8mb4 COLLATE utf8mb4_bin);
    -> CREATE TABLE `posts` (`id` bigint NOT NULL AUTO_INCREMENT, `title` varchar(255) NOT NULL, `body` longtext NOT NULL, `created_at` timestamp NOT NULL, `post_author` bigint NULL, PRIMARY KEY (`id`), INDEX `posts_users_author` (`post_author`), CONSTRAINT `posts_users_author` FOREIGN KEY (`post_author`) REFERENCES `users` (`id`) ON UPDATE NO ACTION ON DELETE SET NULL) CHARSET utf8mb4 COLLATE utf8mb4_bin;
  -- ok (55.972329ms)

  -------------------------
  -- 67.18167ms
  -- 1 migrations
  -- 2 sql statements
第 2 步:为数据库填充种子数据
此步骤中代码见 此 commit。
在开发内容管理系统时,如果加载网页却看不到任何内容,将是一件令人沮丧的事。先给数据库填充数据,然后了解 Ent 的一些概念。
我们使用 go get 安装 MySQL 驱动:
go get -u github.com/go-sql-driver/mysql
创建 main.go,并添加基本种子脚本:
package main

import (
    "context"
    "flag"
    "fmt"
    "log"

    "github.com/rotemtam/ent-blog-example/ent"

    _ "github.com/go-sql-driver/mysql"
    "github.com/rotemtam/ent-blog-example/ent/user"
)

func main() {
    // Read the connection string to the database from a CLI flag.
    var dsn string
    flag.StringVar(&dsn, "dsn", "", "database DSN")
    flag.Parse()

    // Instantiate the Ent client.
    client, err := ent.Open("mysql", dsn)
    if err != nil {
        log.Fatalf("failed connecting to mysql: %v", err)
    }
    defer client.Close()

    ctx := context.Background()
    // If we don't have any posts yet, seed the database.
    if !client.Post.Query().ExistX(ctx) {
        if err := seed(ctx, client); err != nil {
            log.Fatalf("failed seeding the database: %v", err)
        }
    }
    // ... Continue with server start.
}

func seed(ctx context.Context, client *ent.Client) error {
    // Check if the user "rotemtam" already exists.
    r, err := client.User.Query().
        Where(
            user.Name("rotemtam"),
        ).
        Only(ctx)
    switch {
    // If not, create the user.
    case ent.IsNotFound(err):
        r, err = client.User.Create().
            SetName("rotemtam").
            SetEmail("r@hello.world").
            Save(ctx)
        if err != nil {
            return fmt.Errorf("failed creating user: %v", err)
        }
    case err != nil:
        return fmt.Errorf("failed querying user: %v", err)
    }
    // Finally, create a "Hello, world" blogpost.
    return client.Post.Create().
        SetTitle("Hello, World!").
        SetBody("This is my first post").
        SetAuthor(r).
        Exec(ctx)
}
如你所见,程序首先检查数据库中是否已有 Post 实体;若没有则调用 seed 函数。该函数使用 Ent 检索名为 rotemtam 的用户,如果不存在则创建。最后,用该用户创建一篇「Hello, world」日志。
运行:
go run main.go -dsn "root:pass@tcp(localhost:3306)/ent?parseTime=true"
第 3 步:创建主页
此步骤中代码见 此 commit
现在创建博客首页。它包含几个部分:
- 视图 – Go
html/template渲染用户将看到的 HTML。 - 服务器代码 – 包含 HTTP 请求处理器,处理浏览器请求并渲染模板。
- 路由器 – 注册不同路径到处理器。
- 单元测试 – 验证服务器行为是否正确。
视图
Go 具有出色的模板引擎,分为 text/template(通用文本渲染)和 html/template(为 HTML 文档提供额外安全功能,防止代码注入)。了解更多请参阅此文档。
创建第一个用于显示博客文章列表的模板,文件名 templates/list.tmpl:
<html>
<head>
    <title>My Blog</title>
    <link href="https://cdn.jsdelivr.net/npm/bootstrap@5.3.0-alpha1/dist/css/bootstrap.min.css" rel="stylesheet"
          integrity="sha384-GLhlTQ8iRABdZLl6O3oVMWSktQOp6b7In1Zl3/Jr59b6EGGoI1aFkw7cmDA6j6gD" crossorigin="anonymous">

</head>
<body>
<div class="col-lg-8 mx-auto p-4 py-md-5">
    <header class="d-flex align-items-center pb-3 mb-5 border-bottom">
        <a href="/" class="d-flex align-items-center text-dark text-decoration-none">
            <span class="fs-4">Ent Blog Demo</span>
        </a>
    </header>

    <main>
        <div class="row g-5">
            <div class="col-md-12">
                {{- range . }}
                    <h2>{{ .Title }}</h2>
                    <p>
                        {{ .CreatedAt.Format "2006-01-02" }} by {{ .Edges.Author.Name }}
                    </p>
                    <p>
                        {{ .Body }}
                    </p>
                {{- end }}
            </div>

        </div>
    </main>
    <footer class="pt-5 my-5 text-muted border-top">
        <p>
            This is the Ent Blog Demo. It is a simple blog application built with Ent and Go. Get started:
        </p>
        <pre>go get entgo.io/ent</pre>
    </footer>
</div>

<script src="https://cdn.jsdelivr.net/npm/bootstrap@5.3.0-alpha1/dist/js/bootstrap.bundle.min.js"
        integrity="sha384-w76AqPfDkMBDXo30jS1Sgez6pr3x5MlQ1ZAGC+nuZB+EYdgRZgiwxhTBTkF7CXvN"
        crossorigin="anonymous"></script>
</body>
</html>
此模板基于已修改的 Bootstrap Starter Template。关键部分如下:在 index 处理器中,我们会将一组 Post 传给此模板。
在 Go 模板中,传入的任何数据都可以通过 . 使用;range 用来遍历每个帖子:
{{- range . }}
随后输出标题、创建时间和作者姓名(通过 Author 边):
<h2>{{ .Title }}</h2>
<p>
    {{ .CreatedAt.Format "2006-01-02" }} by {{ .Edges.Author.Name }}
</p>
最后输出正文并结束循环:
    <p>
        {{ .Body }}
    </p>
{{- end }}
在项目中使用 embed 包将模板编译进二进制:
var (
   //go:embed templates/*
   resources embed.FS
   tmpl      = template.Must(template.ParseFS(resources, "templates/*"))
)
服务器代码
接下来定义 server 结构体及其构造函数 newServer,该结构体会持有 Ent 客户端:
type server struct {
    client *ent.Client
}

func newServer(client *ent.Client) *server {
    return &server{client: client}
}
然后定义主页面处理器 index,返回所有可用博客文章列表:
// index serves the blog home page
func (s *server) index(w http.ResponseWriter, r *http.Request) {
    posts, err := s.client.Post.
        Query().
        WithAuthor().
        All(r.Context())
    if err != nil {
        http.Error(w, err.Error(), http.StatusInternalServerError)
        return
    }
    if err := tmpl.Execute(w, posts); err != nil {
        http.Error(w, err.Error(), http.StatusInternalServerError)
    }
}
以下代码解释了 Ent 的查询调用:
// s.client.Post contains methods for interacting with Post entities
s.client.Post.
    // Begin a query.
    Query().
    // Retrieve the entities using the `Author` edge. (a `User` instance)
    WithAuthor().
    // Run the query against the database using the request context.
    All(r.Context())
路由器
使用 go-chi 这一流行的 Go 路由库来管理路由:
go get -u github.com/go-chi/chi/v5
定义 newRouter,在路由中挂载所有处理器:
// newRouter creates a new router with the blog handlers mounted.
func newRouter(srv *server) chi.Router {
    r := chi.NewRouter()
    r.Use(middleware.Logger)
    r.Use(middleware.Recoverer)
    r.Get("/", srv.index)
    return r
}
在此函数中,先实例化 chi.Router,然后注册两个中间件:
middleware.Logger— 基础访问日志,记录每个请求。middleware.Recoverer— 捕获处理器抛出的 panic,防止服务器因应用错误崩溃。
最后将 index 函数挂载到 GET /。
单元测试
在将所有代码组合之前,先编写一个简单的单元测试来确认功能正常。
为了测试时使用内存 SQLite 数据库,安装 SQLite 驱动:
go get -u github.com/mattn/go-sqlite3
随后安装测试工具 testify:
go get github.com/stretchr/testify
在 main_test.go 里编写测试:
package main

import (
    "context"
    "io"
    "net/http"
    "net/http/httptest"
    "testing"

    _ "github.com/mattn/go-sqlite3"
    "github.com/rotemtam/ent-blog-example/ent/enttest"
    "github.com/stretchr/testify/require"
)

func TestIndex(t *testing.T) {
    // Initialize an Ent client that uses an in memory SQLite db.
    client := enttest.Open(t, "sqlite3", "file:ent?mode=memory&cache=shared&_fk=1")
    defer client.Close()

    // seed the database with our "Hello, world" post and user.
    err := seed(context.Background(), client)
    require.NoError(t, err)

    // Initialize a server and router.
    srv := newServer(client)
    r := newRouter(srv)

    // Create a test server using the `httptest` package.
    ts := httptest.NewServer(r)
    defer ts.Close()

    // Make a GET request to the server root path.
    resp, err := ts.Client().Get(ts.URL)

    // Assert we get a 200 OK status code.
    require.NoError(t, err)
    require.Equal(t, http.StatusOK, resp.StatusCode)

    // Read the response body and assert it contains "Hello, world!"
    body, err := io.ReadAll(resp.Body)
    require.NoError(t, err)
    require.Contains(t, string(body), "Hello, World!")
}
运行测试验证服务器工作正常:
go test ./...
得到测试通过:
ok      github.com/rotemtam/ent-blog-example    0.719s
?       github.com/rotemtam/ent-blog-example/ent        [no test files]
?       github.com/rotemtam/ent-blog-example/ent/enttest        [no test files]
?       github.com/rotemtam/ent-blog-example/ent/hook   [no test files]
?       github.com/rotemtam/ent-blog-example/ent/migrate        [no test files]
?       github.com/rotemtam/ent-blog-example/ent/post   [no test files]
?       github.com/rotemtam/ent-blog-example/ent/predicate      [no test files]
?       github.com/rotemtam/ent-blog-example/ent/runtime        [no test files]
?       github.com/rotemtam/ent-blog-example/ent/schema [no test files]
?       github.com/rotemtam/ent-blog-example/ent/user   [no test files]
组合所有代码
最后,更新 main 函数,将所有功能整合:
func main() {
   // Read the connection string to the database from a CLI flag.
   var dsn string
   flag.StringVar(&dsn, "dsn", "", "database DSN")
   flag.Parse()

   // Instantiate the Ent client.
   client, err := ent.Open("mysql", dsn)
   if err != nil {
      log.Fatalf("failed connecting to mysql: %v", err)
   }
   defer client.Close()

   ctx := context.Background()
   // If we don't have any posts yet, seed the database.
   if !client.Post.Query().ExistX(ctx) {
      if err := seed(ctx, client); err != nil {
         log.Fatalf("failed seeding the database: %v", err)
      }
   }
   srv := newServer(client)
   r := newRouter(srv)
   log.Fatal(http.ListenAndServe(":8080", r))
}
现在可以运行应用,并看到完整的博客前端:
go run main.go -dsn "root:pass@tcp(localhost:3306)/test?parseTime=true"

第 4 步:添加内容
此步骤更改见 此 commit。
一个完整的内容管理系统必须具备内容管理功能。下面演示如何在博客中添加发布新文章的支持。
先创建后端处理器:
// add creates a new blog post.
func (s *server) add(w http.ResponseWriter, r *http.Request) {
    author, err := s.client.User.Query().Only(r.Context())
    if err != nil {
        http.Error(w, err.Error(), http.StatusInternalServerError)
        return
    }
    if err := s.client.Post.Create().
        SetTitle(r.FormValue("title")).
        SetBody(r.FormValue("body")).
        SetAuthor(author).
        Exec(r.Context()); err != nil {
        http.Error(w, err.Error(), http.StatusInternalServerError)
    }
    http.Redirect(w, r, "/", http.StatusFound)
}
可见,该处理器目前仅从 users 表加载唯一用户(因为尚无用户管理或登录功能)。Only 仅在数据库返回恰好一个结果时成功。
然后挂载到路由器:
// newRouter creates a new router with the blog handlers mounted.
func newRouter(srv *server) chi.Router {
    r := chi.NewRouter()
    r.Use(middleware.Logger)
    r.Use(middleware.Recoverer)
    r.Get("/", srv.index)
    r.Post("/add", srv.add)
    return r
}
接下来在页面中添加表单,以便用户写入内容:
<div class="col-md-12">
    <hr/>
    <h2>Create a new post</h2>
    <form action="/add" method="post">
        <div class="mb-3">
            <label for="title" class="form-label">Title</label>
            <input name="title" type="text" class="form-control" id="title" placeholder="Once upon a time..">
        </div>
        <div class="mb-3">
            <label for="body" class="form-label">Body</label>
            <textarea name="body" class="form-control" id="body" rows="8"></textarea>
        </div>
        <div class="mb-3">
            <button type="submit" class="btn btn-primary mb-3">Post</button>
        </div>
    </form>
</div>
另外,为了让列表从新到旧显示文章,修改 index 处理器,使其按 created_at 降序排列:
posts, err := s.client.Post.
    Query().
    WithAuthor().
    Order(ent.Desc(post.FieldCreatedAt)).
    All(ctx)
最后,编写单元测试验证新增文章功能:
func TestAdd(t *testing.T) {
    client := enttest.Open(t, "sqlite3", "file:ent?mode=memory&cache=shared&_fk=1")
    defer client.Close()
    err := seed(context.Background(), client)
    require.NoError(t, err)

    srv := newServer(client)
    r := newRouter(srv)

    ts := httptest.NewServer(r)
    defer ts.Close()

    // Post the form.
    resp, err := ts.Client().PostForm(ts.URL+"/add", map[string][]string{
        "title": {"Testing, one, two."},
        "body":  {"This is a test"},
    })
    require.NoError(t, err)
    // We should be redirected to the index page and receive 200 OK.
    require.Equal(t, http.StatusOK, resp.StatusCode)

    body, err := io.ReadAll(resp.Body)
    require.NoError(t, err)

    // The home page should contain our new post.
    require.Contains(t, string(body), "This is a test")
}
运行测试:
go test ./...
一切正常:
ok      github.com/rotemtam/ent-blog-example    0.493s
?       github.com/rotemtam/ent-blog-example/ent        [no test files]
?       github.com/rotemtam/ent-blog-example/ent/enttest        [no test files]
?       github.com/rotemtam/ent-blog-example/ent/hook   [no test files]
?       github.com/rotemtam/ent-blog-example/ent/migrate        [no test files]
?       github.com/rotemtam/ent-blog-example/ent/post   [no test files]
?       github.com/rotemtam/ent-blog-example/ent/predicate      [no test files]
?       github.com/rotemtam/ent-blog-example/ent/runtime        [no test files]
?       github.com/rotemtam/ent-blog-example/ent/schema [no test files]
?       github.com/rotemtam/ent-blog-example/ent/user   [no test files]
可视化结果
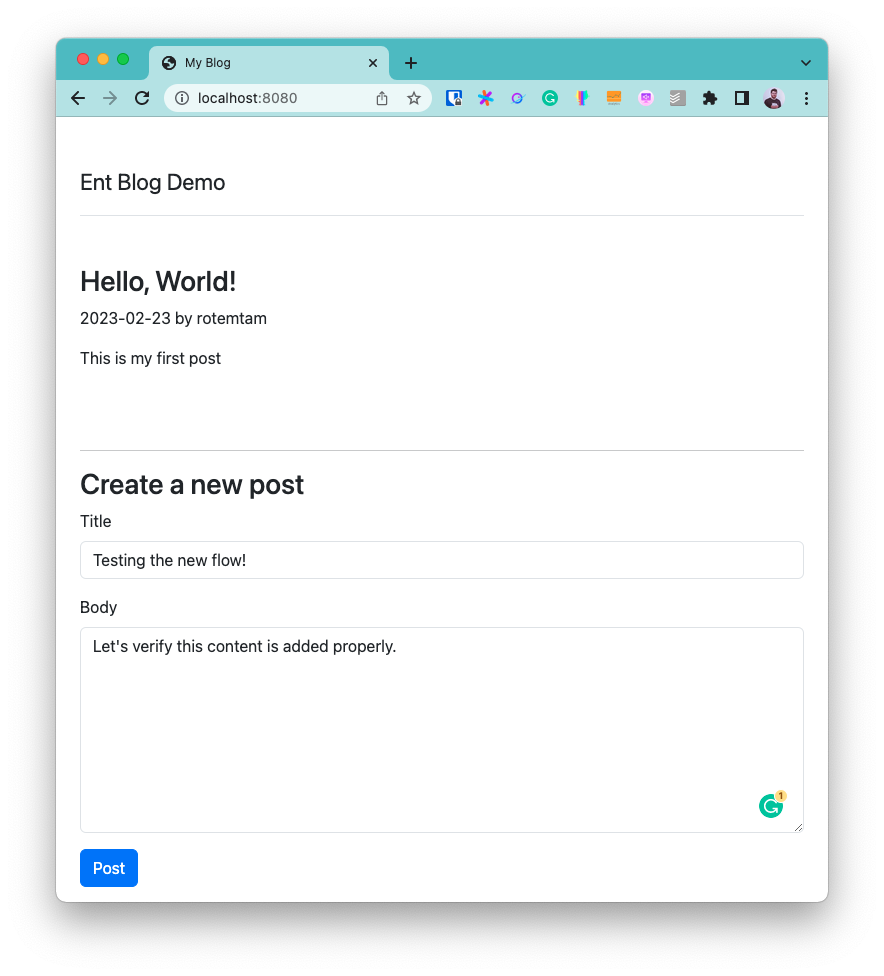
点击提交表单后:

新文章已展示。恭喜!
总结
本文展示了如何使用 Ent 与 Go 构建一个简单的 Web 应用。我们的示例虽然简易,但涵盖了构建应用时需处理的诸多核心要点:定义数据模型、管理数据库 schema、编写服务器代码、设定路由和构建 UI。
作为入门内容,我们只触及了 Ent 的冰山一角,希望你能对其核心特性有初步体验。
- 订阅我们的 Newsletter
- 在 Twitter 上关注我们
- 加入 #ent 在 Gophers Slack(链接)
- 加入 Ent Discord 服务器(邀请)